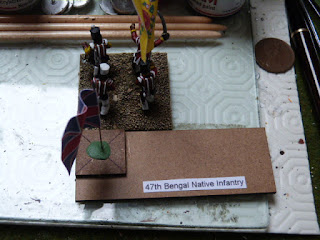
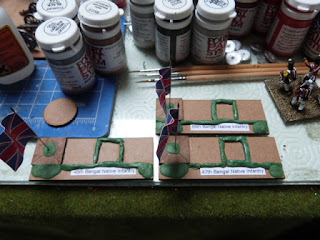
They are designed to be used with Black Powder rules by Warlord Games. Though I did many years ago I knew a couple of wargamers who used similar markers instead of figures as a more cost effective way of gaming.
1. Large base is 40 x 80mm mdf. With PVA, glue the unit name and a 20 x 20mm mdf base to the top left hand corner of the 40 x 80mm base. Set aside to dry.
2. Place a cross on the 20 x 20mm base going from corner to corner to find the centre. Varnish the unit name.
3. Drill a small hole in the centre mark. Add a small amount of super glue to the hole and insert the unit flag.
4. Immediately place a small amount of 2 part epoxy putty (here I have used green stuff), before the super glue has set. This adds extra support for the flag.
5. Using green stuff (or another 2 part epoxy putty) create the shapes for the markers to be placed. Make the ridges a similar height to the 20mm base at the side.
6. The centre section needs to be large enough to hold a D6.
7. The left and right sections to be larger enough to hold a 20 x 20mm base. Slightly dampening the edges of the 20 x 20mm base then slide into the gap to help shape the putty. Remove the 20 x 20mm bases and tidy up the edges by pushing with a wet scalpel.
8. Add a little putty to the bottom corners of the base, and smooth so that there is a gradual slope. Once done set aside to dry. Then finish off to match you're usual basing style, in the this case I've used sand and Foundry Base Sand shades.
9. Below are a couple of markers that I've made from the 20x20mm bases. Again I've used Foundry Sand as the base colour.
10. Below are pictures of the finished bases. The slot for the Brigade marker is secure during play with movement on the table. Casualties taken are indicated by the D6, and unit morale can be easily inserted or removed as required (in this case Shaken).
Unit 4 casualties and Shaken
Unit 1 casualty
Unit no casualty


No comments:
Post a Comment